List of Inuyasha volumes
The manga series Inuyasha was written and illustrated by Rumiko Takahashi and serialized in Shonen Sunday from November 13, 1996, to June 18, 2008. The 558 chapters have been collected into 56 bound volumes by Shogakukan, with the first volume released in May 1997 and the final one in February 2009.
Viz Media licensed the series for an English translated release in North America. Initially, Viz released it in monthly American comic book format (page size 17x26cm, or 6⅝×10¼") under the title "Inu-Yasha[sic]: A Feudal Fairy Tale", with each individual issue containing two or three chapters from the original manga. Eventually, this system was abandoned in favor of collected volumes in trade paperback format, using the same chapter divisions as the Japanese volumes.
The first-edition series of Viz trade paperbacks retained the same title and subtitle but reduced the page size to approximately ISO A5 dimensions (14.5x22.5 cm, or 5⅝x8⅞"). After volume 12, the first-edition A5 series was discontinued. Subsequently, Viz issued new volumes and reprints of older volumes in the "Action Edition" second-edition format, with the simple title "InuYasha" and slightly smaller pages (12.8x19cm, or 5x7½").
Viz released the first 37 volumes on a quarterly schedule, mirror-imaging the artwork to a "flipped" left-to-right format as standard in English-language works, as opposed to the right-to-left reading direction of Japanese. Volume 1 was released on July 6, 1998; volume 37 was released on April 14, 2009. On April 22, 2009, Viz announced that future volumes would be released in an unflipped format on a monthly schedule, starting with volume 38 in July 2009.[1] However, reprints of the first 37 volumes have remained "flipped" instead of being reflipped back to right-to-left.
In November 2009, Viz began to issue a third-edition set of paperbacks in their "VizBig" format, with three of the original volumes combined into each omnibus. These restore the page dimensions to the slightly larger size of the first-edition paperbacks, and also faithfully reproduce the occasional full-color bonus pages that were reduced to grayscale in previous printings.
Viz Media also releases a separate series of "ani-manga" derived from full-color screenshots of the anime episodes, with dialogue and sound effects added in. These volumes are slightly smaller than the regular manga volumes, are oriented in the Japanese convention of right to left, feature new covers with higher quality pages, and are sold at a higher price point versus the regular volumes. Each ani-manga volume is arranged into chapters that correspond to the anime episodes rather than to the manga.
The chapter numbers listed below refer to the overall placement within the series. The Viz reprints have used several different renumbering systems; in the ongoing second-edition collections, the first chapter of each volume is indexed as "Scroll One", the second chapter is "Scroll Two", and so on, with the numbering reverting to "Scroll One" at the start of each new volume.
Volume list
Note: Viz's official English-translated titles through volume 48, unofficial Japanese translations thereafter.
Volumes 1–20
| No. | Title | Japanese release | English release | ||
|---|---|---|---|---|---|
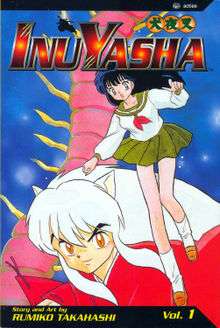
| 1 | Turning Back Time | May 18, 1997[2] ISBN 4-09-125201-X | July 6, 1998 ISBN 1-56931-262-1 | ||
| |||||
| Kagome Higurashi, a 15-year-old junior high school student, is dragged into the Bone Eater's Well by Mistress Centipede, an insect-demon. She escapes and emerges in the past. Kagome turns out to be the reincarnation from the deceased maiden Kikyo, with the sacred Shikon Jewel also reborn inside her body. When Mistress Centipede attacks again and rips out the jewel, Kagome awakes the half-demon InuYasha who was sealed 50 years ago by Kikyo. InuYasha kills Mistress Centipede, then attacks Kagome to get the jewel. Kikyo’s younger sister, Kaede binds InuYasha with a necklace that crashes him into the ground when Kagome says "sit". When a carrion-crow demon steals the jewel, Kagome shoots the crow with an arrow and shatters the jewel into hundreds of shards that scatter all over Japan. Demon Yura of the Hair attacks Kagome to get a jewel shard, throwing Kagome falls down the well and back to her time. Kaede tells InuYasha that to defeat Yura, he needs Kagome's help; he goes through the well to Kagome's time, but Yura sends her hair after them. Kagome returns with InuYasha to his time to stop Yura. | |||||
| 2 | Family Matters | June 18, 1997[3] ISBN 4-09-125202-8 | December 6, 1998 ISBN 1-56931-298-2 | ||
| |||||
| Back in the Feudal era, as InuYasha and Yura fight each other, Kagome breaks open one skull whose hair strands lead to Yura's hands; Yura dissolves, and Kagome recovers Yura's jewel shard. Some time later, Inuyasha's half brother Sesshomaru and his subordinate Jaken search for the grave of The Great Dog Demon, InuYasha's and Sesshomaru's father, and the heirloom sword Tetsusaiga that lies in the grave. InuYasha sees a vision of his dead human mother saying that Sesshomaru has resurrected her and is holding her hostage in exchange for the location of the grave. Kagome destroys the illusion, but Sesshomaru deduces that a portal to the grave is in one of InuYasha's eyes, which he rips out to open the portal. Sesshomaru, Jaken, InuYasha and Kagome pass through the portal and discover Tetsusaiga inside The Great Dog Demon's skeleton. Sesshomaru cannot touch Tetsusaiga because of its magical shield against full demons; Kagome accidentally pulls it from the stone and gives it to InuYasha. InuYasha and Sesshomaru fight, and Sesshomaru retreats after having one arm cut off. | |||||
| 3 | Good Intentions | October 18, 1997[4] ISBN 4-09-125203-6 | May 6, 1999 ISBN 1-56931-340-7 | ||
| |||||
| InuYasha and Kagome meet Takeda Nobunaga on his way to rescue Princess Tsuyu, whose husband's soldiers have been kidnapping young women. InuYasha and Kagome kill the demon and recover its jewel shard, liberating the women from the eggs. In the modern times, a woman approaches the Higurashi shrine to have a flesh-eating Noh mask exorcised, but the mask escapes and takes over her body. Because the mask's body is disintegrating, it tries to compensate by eating more and more people. When the mask attacks Kagome for her jewel shards, she runs away and sends Sota to the well to summon InuYasha. InuYasha follows them and destroys the mask, recovering the jewel shard which was animating it. Back in the Feudal era, a child demon named Shippo steals Kagome's jewel shards, seeking revenge on the Thunder Brothers Hiten and Manten for his father's death. Manten senses that Shippo has some shards and goes after him. | |||||
| 4 | Lost and Alone | December 10, 1997[5] ISBN 4-09-125204-4 | May 6, 1999 ISBN 1-56931-368-7 | ||
| |||||
| Manten captures Kagome, planning to boil her to make hair-potion. Hiten and Manten find and fight InuYasha to get the remaining shards. Manten is about to kill Shippo and Kagome when InuYasha throws Tetsusaiga at him, killing him. Hiten eats Manten's heart to absorb his brother's demonic powers into his own. However, InuYasha slices him in two with Tetsusaiga. While Tetsusaiga's scabbard is being repaired, Kagome returns to modern times. A girl's ghost is trying to hurt people. The girl, Mayu, died in a fire and mistakenly blames her death on her mother and brother (also injured in the same fire). InuYasha stops Mayu from killing her brother and Kagome. When the soul piper demon tries to drag Mayu to Hell to become an evil spirit, InuYasha and Kagome follow them to the apartment where she died. Kagome grabs Mayu from the brink of Hell, telling her to reconcile with her mother. Mayu agrees and the demon releases her. Mayu and her mother forgive each other and Mayu becomes a good spirit, ascending to Heaven. | |||||
| 5 | Flesh and Bone | March 18, 1998[6] ISBN 4-09-125205-2 | January 5, 2000 ISBN 1-56931-433-0 | ||
| |||||
| While staying in a temple, InuYasha, Kagome, Shippo and Myōga are attacked by spiders-heads. The night of the new moon temporarily strips InuYasha of his demonic powers, but the group is able to escape. When InuYasha and Shippo go back for the jewel shards, the leader of the spider-heads injects InuYasha with spider venom. Kagome rescues InuYasha and they hide in another room, sealing the door with Tetsusaiga while Myoga sucks out the venom. InuYasha regains his demon strength at sunrise and kills the master by ripping the shards back out. Meanwhile, the ogress Urasue robs Kikyo's grave and creates a clay doll from her ashes and grave dust, attempting to resurrect the dead miko. Realizing that Kikyo's soul has been reincarnated, Urasue kidnaps Kagome; just as the others arrive, Urasue drives the soul out of Kagome's body when InuYasha utters Kikyo's name. Revived in the clay body, Kikyo kills Urasue and tries to kill InuYasha, blaming him for her death. | |||||
| 6 | Wounded Souls | May 18, 1998[7] ISBN 4-09-125206-0 | May 2000 ISBN 1-56931-491-8 | ||
| |||||
| InuYasha denies killing Kikyo, who runs away when Kagome starts recovering her soul. Miroku, a lecherous and thieving monk, recruits Hachiemon, a racoon-dog demon, to help him steal the shard. When InuYasha and Kagome find him in a town, they run to the outskirts to avoid endangering the town's people. Miroku uses his wind tunnel against InuYasha, who is saved when Kagome leaps between them. Miroku identifies Naraku as the killer of Kikyo. They decide to work together to hunt Naraku and collect jewel shards. An artist is creating demons from his paintings of Hell, drawn with a jewel shard in his ink. He fights with InuYasha. When he gets a cut and spills ink on himself, the ink dissolves him. Kagome picks up the tainted jewel shard, purifying it in the process. | |||||
| 7 | Close Enemies | August 8, 1998[8] ISBN 4-09-125207-9 | October 30, 2000 ISBN 1-56931-539-6 | ||
| |||||
| To replace the arm cut off by InuYasha, Naraku offers Sesshomaru a human arm with a jewel shard embedded in it, claiming that it will allow him to wield Tetsusaiga. Sesshomaru finds InuYasha and his friends, knocks Tetsusaiga away, and seizes it with his new arm. Sesshomaru unleashes a giant demon which Miroku starts to suck into his wind tunnel, but the poisoned bees sting Miroku and force him to stop. InuYasha partially tears off Sesshomaru's new arm and reclaims Tetsusaiga, which regains its powers. Sesshomaru flees to remove the rest of the arm, which is turning against him. When Naraku explains that he added something to allow him to retrieve his jewel shard, Sesshomaru decides to kill Naraku. Fearing for Kagome's safety, InuYasha takes away her jewel shard and throws her down the bone-eater's well, trapping her in modern times by blockading it. InuYasha fights off the hell-wolf Royakan, to whom Naraku then gives a jewel shard and a plant that will kill Royakan unless he kills InuYasha. | |||||
| 8 | Stolen Spirit | November 18, 1998[9] ISBN 4-09-125208-7 | July 6, 2001 ISBN 1-56931-553-1 | ||
| |||||
| Shippo hides at the bottom of the bone-eater's well with a shard, which allows Kagome to return to the feudal era just as Royakan's wolves detect Shippo's location. Energized by her nearby scent, InuYasha easily defeats Royakan. After InuYasha spots him spying nearby, Naraku describes his origin from the fusion of Onigumo with a horde of demons and admits tricking InuYasha and Kikyo into betraying each other. As Naraku disappears into a miasma, Kagome removes the jewel shard in Royakan's forehead, saving his life and turning him back into a friendly demon. InuYasha hears of Kikyo’s location this searches for her. Kagome finds Kikyo first, but Kikyo binds Kagome with a concealment spell. When InuYasha confronts Kikyo about stealing souls, Kikyo embraces him and tries to drag him down to Hell. Angered by this sight, Kagome unconsciously tries to pull her detached soul fragment away from Kikyo, forcing her to release InuYasha and flee. | |||||
| 9 | Building a Better Trap | January 18, 1999[10] ISBN 4-09-125209-5 | October 10, 2001 ISBN 1-56931-643-0 | ||
| |||||
| The "Peach Man" Tokajin lives on a mountainside and eats both people and peaches. A riverside tree consumes his leftovers and bears fruits that look like human heads, which InuYasha's group find floating downstream. InuYasha goes ahead, hoping to finish before the night of the new moon. Tokajin knocks Tetsusaiga away, then shrinks and swallows InuYasha. Shippo and the others fall into Tokajin's tiny magical garden that shrinks them down to scale. Inside Tokajin's stomach, InuYasha loses his demonic powers, but stabs Tokajin's belly to get vomited out. He regains his full size, but awakes entangled in a thorn bush as Tokajin plans to pickle him. Tokajin takes Kagome out of his tiny garden to restore her to full size as his next meal. Miroku and Shippo escape by hanging onto Tokajin's sleeve and Miroku and help InuYasha to untangle himself. InuYasha breaks into the kitchen and sees Kagome being boiled alive in sake. They find Tokajin's mentor, a sage who regrets his actions, but is powerless to stop him since he has been converted to a plant. Tokajin acquired his mentor's powers by eating him, except for the secret of longevity which is why he preserved his head. The mentor changes himself into a bow to help Kagome to shoot a sacred arrow at Tokajin as he battles with InuYasha. Her arrow dislodges a jewel shard from Tokajin, whom InuYasha then tackles out through the window. Tokajin is killed by the fall, but InuYasha lands in the tree and is saved. Sango exterminates a demon and takes its jewel shard as payment. InuYasha's group hears of this and goes looking for her. Naraku manipulates Sango's brother Kohaku into killing their relatives as they exterminate a demon, then sends his demons to kill the rest of Sango's village and take their jewel shards. When Sango survives, Naraku tricks her into blaming InuYasha for the murders. | |||||
| 10 | A Warrior's Code | April 17, 1999[11] ISBN 4-09-125210-9 | January 9, 2002 ISBN 1-56931-703-8 | ||
| |||||
| Seeking revenge but still weakened by her injuries, Sango allows Naraku to embed a jewel shard into her back before she attacks InuYasha. During the battle, Naraku steals Kagome's jewel shard and flees, but also partially reveals his demonic nature; distrusting him, Sango sends Kirara after him. She faints and awakens while being carried on InuYasha's back as he chases Naraku, who confesses that he killed Sango's relatives to steal their jewel shards. She joins the group as the best way to find Naraku and get revenge. A village headman's son pays InuYasha's group to destroy a water god who has been demanding the village boys as sacrifice. The god's attendants are brushed aside, but the god himself is armed with the Amakoi Halberd which is stronger than Tetsusaiga. Some water sprites tell Miroku that the true water goddess is sealed in a cave, and Miroku and Sango free her as InuYasha fights the impostor. | |||||
| 11 | Scars of the Past | August 1999[12] ISBN 4-09-125581-7 | July 6, 2002 ISBN 1-59116-022-7 | ||
| |||||
| The real goddess opens the waters to help InuYasha fight the impostor god, and kill it. Miroku secretly leaves the group to visit his foster father, Mushin, who can repair the wound from his tunnel. Naraku hears of this and sends a demon puppet to lead the rest of InuYasha's group away from Miroku. An urn grub possesses Mushin and causes him to attack Miroku during surgery; Miroku escapes to his father's grave site besieged by demons. InuYasha and the others stop the demon and save Mushin. Mushin repairs Miroku's hand as far as he can, but the wind tunnel is permanently widened. Concerned by InuYasha's increasing power, Naraku resurrects Kohaku with a jewel shard in his back and sends him to destroy a village. Sango follows Kohaku to a meeting with Naraku, who threatens to destroy Kohaku unless she brings him Tetsusaiga. To keep Kohaku from killing himself by removing the jewel shard, Sango steals Tetsusaiga and takes it to Naraku. | |||||
| 12 | Trials and Traps | October 1999[13] ISBN 4-09-125582-5 | October 6, 2002 ISBN 1-59116-023-5 | ||
| |||||
| Naraku orders Kohaku to kill Sango, who is wounded but tries to restrain him instead of fighting back. InuYasha's group arrives and attacks Naraku, but he dissolves into poisonous vapor. Kagome purifies the vapors and destroys most of Naraku's body with her sacred arrow, but Kohaku escapes with Naraku's head. InuYasha and Kagome leave Kirara and Sango in the care of Miroku and Shippo while they look for herbs to counteract the poison. They find that a half-demon named Jinenji is wrongly accused of eating his fellow villagers. Kagome stays with him and his mother to protect them from the villagers, while InuYasha searches for the real culprit. When the real man-eating demon and its offspring also attack, Kagome wounds it with an arrow, but gets knocked down; Jinenji saves her by punching the man-eater in the mouth and grappling with it. InuYasha returns and kills the demon's offspring while Jinenji rips the parent demon apart. Jinenji gives healing herbs to the villagers, who help repair the damage to his field. InuYasha's group finds a pit where hundreds of demons are trapped together by Naraku's spells, and are fusing into a composite "imp" intended to become Naraku's new body. Miroku warns InuYasha not to kill it, lest he become absorbed into the composite. Kikyo arrives to investigate the pit's evil aura and falls in. | |||||
| 13 | The Mind's Eye | December 1999[14] ISBN 4-09-125583-3 | April 2003 ISBN 1-56931-808-5 | ||
| |||||
| As InuYasha fights the composite imp to protect Kikyo, Kagome jumps into the pit herself, hoping to save Kikyo and calm InuYasha down. Saying that Kagome's actions are more likely to make InuYasha lose his reason instead, Kikyo shoots an arrow that breaks Naraku's spell and frees the imp from its pit.
Pursued by Kikyo, InuYasha and Kagome, the imp escapes and attacks Naraku for imprisoning it, but he absorbs it as his new body. Naraku casts a magic barrier that blocks InuYasha from attacking him, and takes Kikyo to the Hitomi castle where they discuss their past. Naraku sends nightmarish illusions to ensnare InuYasha's group. Immune to the illusions, Kagome shoots at Naraku's demon puppet, but a sinkhole opens up and nearly swallows her. Kikyo finishes destroying the demon puppet and tells her that Naraku fears Kagome more than anyone. Kikyo steals Kagome's jewel shard, tells her that only one of them (Kikyo or Kagome) is needed, and allows her to fall into the sinkhole. InuYasha's concern for Kagome breaks the spell on him; he rescues Miroku, who rescues Sango. InuYasha pulls Kagome out of the sinkhole. Kikyo gives Naraku the jewel shard, intending to let him collect the rest of the jewel and then kill him for it. The swordmsith Toto-sai attacks InuYasha with a hammer and blocks Tetsusaiga with a piece of leather, testing whether InuYasha is worthy of the sword; if not, then Toto-sai, who first made Tetsusaiga, will destroy it. Sesshomaru threatens to kill Toto-sai for not making another sword like Tetsusaiga for him. When the brothers fight each other, Toto-sai breathes fire to interrupt them and tells Sesshomaru that the sword Tenseiga is superior to Tetsusaiga, but Sesshomaru calls Tenseiga a mere slab. Toto-sai strikes his hammer into the ground, causing lava to erupt, and escapes with InuYasha's group. Sesshomaru demonstrates to Jaken that he cannot kill with Tenseiga, which is a sword of healing. InuYasha again fights Sesshomaru, who uses a dragon's arm to fend off Tetsusaiga until InuYasha figures out how to use Tetsusaiga's "Wind Scar" attack. | |||||
| 14 | Gray Areas | March 2000[15] ISBN 4-09-125584-1 | June 2003 ISBN 1-56931-886-7 | ||
| |||||
| Partially blinded by poison, InuYasha hits Sesshomaru with his new "Wind Scar", causing his brother to disappear in a flash of light. Toto-sai decides that InuYasha is worthy of Tetsusaiga after all and agrees to hone the blade; he also says that Tenseiga chose to save Sesshomaru.
Some distance away, Sesshomaru awakes paralyzed by his wounds, but alive. A little girl, Rin, finds him, dumps water on his head, and offers him food which he rejects. The villagers beat Rin for stealing the fish she took to Sesshomaru, but when he asks what happened to her, she just smiles. The wolf-demon Koga leads his pack to Rin's village in search of a jewel shard; all of the villagers are killed, including Rin. Healed from his wounds, Sesshomaru follows the scent of blood to Rin's body and uses Tenseiga to resurrect her. InuYasha's group kill some of Koga's wolves, who howl to summon their leader. When Koga returns to fight, Kagome senses the jewel shards in one of his arms and both legs. Koga retreats before InuYasha can use the Wind Scar, then returns to kidnap Kagome and Shippo. Koga tells Kagome to help him find jewel shards, and that he has taken her for his mate. She shows him the location of the jewel shard implanted in his arch-enemy, the king of the harpy demons. As the wolf-demons fight with the harpies, she saves one of Koga's friends with a sacred arrow; InuYasha's group arrives and help to destroy the harpies, but the harpy king escapes. As Koga and InuYasha fight over Kagome, the harpy king returns to rip the jewel shard out of Koga's arm, severely wounding him. InuYasha destroys the King with the wind-scar and takes his jewel shards, but Kagome stops him from killing Koga for the two shards in his legs. Koga's friends carry him away over his protestations, InuYasha and Kagome argue, and she returns home to modern Tokyo. | |||||
| 15 | Feminine Wiles | May 2000[16] ISBN 4-09-125585-X | October 15, 2003 ISBN 1-56931-999-5 | ||
| |||||
| In modern Tokyo, Kagome's friends push her to date their schoolmate Hojo; her reluctance makes them accuse her of having another boyfriend. They badger her into talking about InuYasha, who ends up sounding like a violent, selfish, two-timing chump. Kagome tries to defend his character, making her friends conclude that she loves him.
InuYasha climbs into Kagome's room, where her brother Sota warns him that she is in a really bad mood. InuYasha tells Sota to keep his visit secret and goes back to the past. Kagome studies for her exams; InuYasha comes back to watch her sleeping, then runs away when her alarm clock goes off. Kagome returns to the past and is about to apologize (insincerely) to InuYasha when he apologizes to her for breaking her alarm clock. InuYasha's group fights a man-eating bear with a jewel shard in its forehead, but before they can defeat it, a swarm of Saimyosho stings the bear and takes its shard. When the group follows the swarm to a castle, they meet Kagura, who has already killed Koga's followers and now uses the corpses to attack InuYasha, covering him with wolf blood. With a fake, poisonous shard in his body, Koga arrives, concludes that InuYasha killed the pack, and fights him. After Koga defeats InuYasha, Kagura uses the wolf corpses to attack their former leader, who now realizes the deception but collapses from the poison. InuYasha revives, but cannot use the Wind Scar until Kagome shoots an arrow that disrupts Kagura's control of the wind. The Wind Scar reveals the mark of a spider on her back before she escapes. Because of the spider mark and her scent, both of which resemble Naraku's, they conclude that she is a "detachment" created by Naraku. Kagome uses an arrow to dig the poisonous shard out of Koga, who revives and flees. Kagura confronts Naraku and accuses him of endangering her by not telling her about Tetsusaiga's powers, but Naraku threatens to kill her himself. Koharu, a young girl in love with Miroku, is so overjoyed to meet him again after a three-year absence that Kagome and Sango suspect him of having been intimate with her when she was only eleven years old, but Miroku denies it. Koharu wants to join the group to stay with Miroku, but he tells her that it would be too dangerous; Sango begins to feel jealous. They take Koharu to another village where she will no longer be enslaved. Kanna, another detachment of Naraku, uses her mirror to steal the villagers' souls and control their bodies. Sango throws her boomerang, but Kanna's mirror bounces it back and knocks Sango out. Kanna controls Koharu into seizing Kagome to steal her soul. As the controlled villagers fight with InuYasha, Kagura arrives. | |||||
| 16 | Mirror Image | July 2000[17] ISBN 4-09-125586-8 | December 31, 2003 ISBN 1-59116-113-4 | ||
| |||||
| Kagome's soul is too large to fit into Kanna's mirror; although weakened, Kagome is able to defend herself and prevent Kanna from taking her jewel shards. Koharu attacks Miroku, but he knocks her out.
Kanna flees and reappears behind Kagura, who is fighting InuYasha. Kagura deliberately lapses her control of the wind, allowing InuYasha to launch a wind-scar attack on Kagura; Kanna reflects it back at InuYasha, severely wounding him. Naraku himself appears and gloats over InuYasha's failure. Miroku is about to open his wind tunnel, but Naraku points out that it would devour all of the souls trapped in Kanna's mirror. The controlled villagers attack Miroku; Naraku orders Kagura to take InuYasha's head. Meanwhile, Kagome has Kirara carry her to InuYasha and Miroku. Naraku says that his power to create detachments comes from the nearly-complete jewel which Kikyo stole from Kagome and gave to him. When Kagome shoots an arrow at Naraku's group, Kanna tries to reflect it, but her mirror begins to crack from the extra charge of spiritual force added to its burden of souls. Kanna is forced to release all the souls to save her mirror, losing control of the villages and allowing Kagome to recover. Kagura launches a wind attack which Miroku sucks into his wind tunnel, and Naraku's group flees. InuYasha's group moves to another location to let InuYasha and Sango recover. While Kagome and Miroku are out looking for food and medicine, Kikyo meets with InuYasha. Kagura spies on them for Naraku. but Kikyo drives her away and leaves. Kagome and Miroku return and question InuYasha about Kikyo. Goshinki, an ogre detachment of Naraku, devours the inhabitants of a village. InuYasha's group cannot fight him effectively because he anticipates their moves by reading their minds. Goshinki breaks Tetsusaiga with his teeth, then knocks out Miroku and tries to eat Kagome. InuYasha completely loses his half-human personality and transforms to his "full"-demon form, killing Goshinki with his bare hands. Kagome stops his crazed rampage and reverses his transformation with "sit". On Myoga's advice, the group collects Tetsusaiga's pieces and takes them to Toto-sai, who pulls out one of InuYasha's fangs to repair Tetsusaiga. While they wait for the repairs, InuYasha loses his powers due to the new moon. Sesshomaru takes Goshinki's head to Toto-sai's renegade apprentice, Kaijinbō, to make a sword from the fangs that broke Tetsusaiga. When Jaken goes to collect the resulting sword, Tokijin, Kaijinbō kills him with it. | |||||
| 17 | A Savage Cut | August 2000[18] ISBN 4-09-125587-6 | April 7, 2004 ISBN 1-59116-238-6 | ||
| |||||
| Sesshomaru resurrects Jaken with Tenseiga. Controlled by the sword Tokijin, Kaijinbo attacks InuYasha during the night of the new moon; the rest of the group tries to fight him off while InuYasha remains in his vulnerable full-human form. Tokijin cuts Sango's boomarang in half; even when Miroku splits Kaijinbo's head open, his body keeps fighting.
Toto-sai brings the reforged Tetsusaiga, but InuYasha cannot use the sword at full strength-- in human form, he cannot tap into its demonic powers, and when his half-demon shape returns, the sword becomes almost too heavy to lift. When Tetsusaiga and Tokijin clash, Kaijinbo's body disintegrates under the strain. Toto-sai says the extra weight is from InuYasha's fang and he must build up his strength. Sesshomaru claims Tokijin, easily overcoming its evil aura, then knocks Tetsusaiga out of InuYasha's hands to test his brother's transformation. InuYasha involuntarily returns to berserker full-demon mode again; Toto-sai breathes fire as cover to let the rest of the group drag InuYasha away. Toto-sai repairs Sango's boomerang. The group persuades InuYasha to never part with Tetsusaiga again, though without telling him that it suppresses his full-demon transformation. Yearning for freedom, Kagura asks Sesshomaru to kill Naraku, who now creates two new detachments: Juromaru and Kageromaru. Although partially bound, Juromaru fights and pursues Koga. As their path intersects InuYasha's group, Naraku unshackles Juromaru's muzzle and chains. Juromaru destroys Naraku's surrogate demon puppet and fights InuYasha. Kageromaru emerges from Juromaru's gut to join the fight, moving almost too quickly to see, and eats some of InuYasha's innards. Koga rejoins the fight to protect Kagome, taking on Kageromaru while InuYasha focuses on Juromaru. InuYasha passes out but awakes when Kageromaru threatens to eat Kagome. | |||||
| 18 | Love and Lust | October 2000[19] ISBN 4-09-125588-4 | July 7, 2004 ISBN 1-59116-331-5 | ||
| |||||
| InuYasha cuts off one of Kageromaru's arms; when the injured "detachment" hides underground, Sango poisons the nearby soil to drive him back up. Kageromaru emerges and disappears back into Juromaru's gut. InuYasha unleashes the Wind Scar to destroy both detachments. Nearly hit by the Wind Scar himself, Koga argues with InuYasha until Kagome ends it with a "sit"; after Koga departs, InuYasha jealously argues with Kagome and she goes home.
Naraku sends a giant soul-collector demon to deprive Kikyo of the dead souls she uses for energy. Unable to fight the demon, she flees, running into InuYasha as he waits near the Bone Eater's Well for Kagome's return. InuYasha destroys the demon. Kikyo tells him that Naraku tricked her into sealing InuYasha onto the sacred tree out of jealousy, wanting to eliminate his rival and take her for himself more than he wanted the Shikon Jewel. Kagome returns to see Kikyo and Inuyasha embracing, while Naraku secretly watches all of them in Kanna's mirror. Kikyo uses soil from Onigumo's cave to protect herself from Naraku, whose right arm she then shoots off; when one of his demons touches her, it dissolves. She warns him to leave her alone or suffer the same fate. Kagome gives her supplies to Miroku and Sango and returns home again. Miroku tells InuYasha to go to Kagome to retrieve her jewel shard and then leave her alone. When Kagome's friends again tell her to dump InuYasha, she tells them he dumped her and she doesn't want to talk about it. Although she says she is fine, they sense her grief. She cannot make herself return the shard to InuYasha because she might never see him again, exposing how deeply she loves him. She finally returns to InuYasha, confessing that she needs to be with him even if he is still in love with Kikyo. Naraku's castle disintegrates and the barrier hiding its location dissipates. When InuYasha's group investigates the ruins, the remains of Sango's family convinces them that it is the real thing and they move the remains to sacred ground. Kohaku has forgotten Naraku, but the sight of approaching saimyosho jogs his memory and he flees. He encounters InuYasha's group, which fights off the saimyosho from taking the jewel shard that keeps Kohaku alive. As Sango treats Kohaku's wounds, she tells him that he is her brother. More demons come with Kagura, who demands Kohaku's shard despite suspecting that Naraku is playing a trick on them. | |||||
| 19 | Target: Kagome! | February 2001[20] ISBN 4-09-125589-2 | September 7, 2004[21] ISBN 1-59116-678-0 | ||
| |||||
| Kagura leads a demon horde against InuYasha's group, supposedly to recover Kohaku's jewel shard. As the others fight, Kagome and Kohaku wait inside the shelter until demons break in. Kohaku fights them off, then runs into the forest with Kagome to hide.
Miroku notices that the demons are still focused on him, InuYasha, and Sango instead of pursuing Kohaku, and concludes that Kohaku is still working for Naraku to get Kagome. Miroku opens his wind tunnel to finish the fighting, in spite of being stung by saimyosho, and Kagura flees. Naraku's demon puppet orders Kohaku to kill Kagome, but he only wounds her, grabs the jewel shards, and runs away. Sango pursues him alone, planning to kill him to free him from Naraku and then commit suicide. InuYasha stops her and recovers the shards. Kohaku escapes with Kagura's help, but Naraku punishes him by briefly restoring his unbearable memories. An ancient Magnolia tree-demon, Bokusen'on, whose branches were made into the scabbards of Tetsusaiga and Tenseiga, explains InuYasha's demonic transformation to Sesshomaru. Gatenmaru, a moth-demon, leads bandits to raid a village. When InuYasha cuts Gatenmaru's war-ax with Tetsusaiga, Gatenmaru envelops InuYasha and Miroku in a poisonous cocoon and tries to take Tetsusaiga, but it burns him as it burned Sesshomaru. InuYasha undergoes his demonic transformation, rips through the cocoon, and kills Gatenmaru and all of the bandits, even though some of them were pleading for their lives. To test the information from Bokusen'on, Sesshomaru arrives, knocks out InuYasha, and leaves. When the group gives Tetsusaiga back to InuYasha, he returns to his normal form and is appalled at his own actions. Afraid that he might kill Kagome when transformed, InuYasha asks Toto-sai for advice. Toto-sai suggests killing InuYasha's father's killer, Ryukotsusei, to gain more control over Tetsusaiga. As InuYasha arrives at the place where Ryukotsusei is sealed, Naraku breaks the seal and tells Ryukotsusei that InuYasha is the son of his old enemy. | |||||
| 20 | Shards of Evil? | March 17, 2001[22] ISBN 4-09-125590-6 | January 4, 2005[23] ISBN 1-59116-626-8 | ||
| |||||
| InuYasha is unable to injure Ryukotsusei, who gloats that his body is harder than steel and thus invulnerable. Toto-sai arrives with InuYasha's group and says that unsealed, Ryukotsusei can only be destroyed with the Bakuryu-ha ("crushing stream", or "backlash wave" in the anime).
When Tetsusaiga is knocked away, InuYasha transforms to his demonic form and begins to drive Ryukotsusei back, but Toto-sai says this will not make Tetsusaiga lighter and wants to flee. Kagome insists that they stay to support InuYasha, who returns to his normal form when he recovers Tetsusaiga, which starts to feel less heavy. InuYasha pierces Ryukotsusei's heart, but Ryukotsusei merely bleeds a little and keeps fighting. Toto-sai advises InuYasha to run away now that Tetsusaiga is lighter, but InuYasha refuses and says that he will out-do his father by killing Ryukotsusei. Enraged, Ryukotsusai uses his entire aura to unleash an enormous blast of energy; unable to dodge it, InuYasha cuts through it with the wind-scar. Toto-sai is amazed – this is the Bakuryu-ha, Tetsusaiga's ultimate move, which reverses Ryukotsusei's blast and cuts him into small pieces with whirlwinds. InuYasha demonstrates that he can now produce the wind-scar at will, but is chastised for showing off. Naraku offers the nearly-complete Shikon jewel to the dark priestess Tsubaki, a former contemporary of Kikyo's, who preserves her youth and beauty by dealing with demons. Kagome tells her friends in modern Tokyo that she made up with InuYasha; when she returns, Tsubaki uses the jewel to curse Kagome's jewel shards and control her. Miroku and Sango look for Tsubaki, hoping to kill her and free Kagome. At Naraku's request, Tsubaki orders Kagome to kill InuYasha and is surprised at her resistance. Naraku tells her not to underestimate Kagome, since she is Kikyo's reincarnation, but Tsubaki is unimpressed. Kagome tells InuYasha to run away so she can't kill him, but he stays. Miroku and Sango cannot pass through Tsubaki's shield, but Kikyo walks right through it and destroys Naraku's demon puppet. Tsubaki realizes that Kikyo is undead. Kikyo says that Kagome will defeat Tsubaki, and threatens to kill Tsubaki herself if InuYasha is harmed. InuYasha brings Kagome, who shatters Tsubaki's shield with an arrow. Kikyo leaves. Tsubaki threatens to kill InuYasha if he uses Tetsusaiga, attacks him with her main demon, and reinforces her curse on Kagome. Miroku is unable to exorcise Tsubaki's shikigami to break the curse. Kagome manages to shoot an arrow at Tsubaki, but it misses and Tsubaki reinforces her curse again. After InuYasha kills Tsubaki's main demon, her other demons and shikigami all attack. Kagome rebounds the shikigami, just as Kikyo did in another duel with Tsubaki fifty years ago. The curse breaks and the jewel is purified, although Tsubaki carries it away with her remaining demons before they die. A saimyosho takes the jewel away from Tsubaki, completing her defeat. | |||||
Volumes 21–40
| No. | Title | Japanese release | English release | ||
|---|---|---|---|---|---|
| 21 | Yet Another Naraku | June 18, 2001[24] ISBN 4-09-125641-4 | April 12, 2005 ISBN 1-59116-740-X | ||
| |||||
| An orphaned girl, Satsuki, hopes that her "Shikon shard" will bring her older brother back from the wars. Shippo brings her to the house of the village headman, where the group is staying after Miroku exorcized a lizard demon there. Kagome and Sango look at Satsuki's shard and tell Shippo that it is just a "stone flower", a quartz crystal. Shippo tries to steal a real jewel shard for Satsuki, but InuYasha stops him. The lizard demon returns, disguised as Satsuki's brother, and takes her hostage. Shippo helps her escape, while InuYasha and Miroku kill the demon and then credit Shippo for it. Rather than remaining in her family's empty hut, Satsuki finally agrees to let the headman's family adopt her.
Koga's and InuYasha's two groups both catch Naraku's scent from a different castle. As Koga runs ahead, Kagura decides to attack him and cuts the jewel shards out of his legs. InuYasha's group arrives before she can kill Koga, so she takes his shards and flees. As both groups pursue her, Kagura finds Sesshomaru and offers him her shards if he will kill Naraku. When he refuses, she calls him a coward and tries to fight her pursuers. She drops the shards when Koga hits her, but she notices that InuYasha is transforming from human to half-demon, exposing his weakness on the night of the new moon. She attacks InuYasha with the dance of the dragon and he counters with his wind scar, now strong enough to work against her wind magic. Naraku's demons sacrifice themselves to let Kagura escape; when she returns to the castle, Naraku (who was secretly reorganizing his body) threatens to reabsorb her if she keeps displaying her own initiative. Koga returns the shards to his legs and flees before InuYasha can take them. A beautiful princess is bewitching men from their village into a mountain and stealing their youth. Miroku and Sango go to investigate, but a spiritual barrier separates them. The "princess" tries to seduce Miroku, but Sango interrupts and exposes the true form of a dog-demon which Miroku exorcises. Sango kills the dog-demon and Miroku comforts the freed princess, a long-dead spirit who now ascends to heaven. The villagers regain their youth and return home. Miroku lets Sango know that he thinks she is special, making her blush in confusion until he pats her rump. She slaps him. Bandits find a large, random lump of flesh and stab it. A new detachment of Naraku emerges as a naked faceless figure that kills the men, rips their faces off, and tries them on while checking its reflection in the river. A monk named Muso tries to exorcise the demon, but it kills him and decides to keep his face and name. A woman tells InuYasha's group what happened. When they finds a burning village full of dead bodies. Muso (the demon) says that he enjoyed killing them. InuYasha is surprised that Muso knows nothing of Naraku or InuYasha, while Naraku watches this in Kanna's mirror. | |||||
| 22 | Cast-Off Heart | September 9, 2001[25] ISBN 4-09-125642-2 | July 6, 2005 ISBN 1-59116-840-6 | ||
| |||||
| When InuYasha cuts off Muso's arm, saimyosho fuse into a new arm for him. Muso calls Kagome "Kikyo" before InuYasha seems to destroy him with the wind-scar. The group realizes that Muso is Onigumo, Naraku's original human core.
Naraku releases Kagura from her chains and sends her after Muso. Guided to Onigumo's cave by the saimyosho, Muso recovers Onigumo's memories. Kagura tells InuYasha's group where Muso is, and they prevent him from killing Kaede. Muso tells them Onigumo didn't want Naraku to kill Kikyo. After fighting Muso for a while, InuYasha aims at his spider mark, but Kagura pulls Muso away to Naraku, who forcibly reabsorbs him in InuYasha's sight. Naraku admits that he needs Onigumo to re-assemble himself during his periods of vulnerability as a half-demon. InuYasha uses the wind-scar against Naraku and Kagura, but Naraku blocks it and escapes. InuYasha asks Toto-sai how to break any barrier with Tetsusaiga. Myoga tells him to kill a certain ogre-bat who can create a powerful barrier, but the ogre that Myoga mentions is already dead. The ogre's half-human daughter is being raised by the lord of the ogre-bats, her grandfather, to maintain the barrier in her late father's place. When the bats raid Shiori's former village, InuYasha's group saves Shiori's human mother from the angry villagers. The ogre-bat lord had promised to spare the village if they gave him Shiori, but he now refuses to honor that promise and he threatens to kill Shiori's mother. Miroku sucks some of the attacking ogre-bats into his wind tunnel, but the rest hide behind the ogre-bat lord, who is carrying Shiori to generate the barrier around him. The grandfather admits that he killed his son himself for consorting with humans. To avenge her father, Shiori expels all the ogres from the barrier and InuYasha destroys them with the backlash wave. Shiori asks InuYasha to break the magic orb that creates the barrier; her grandfather's ghost emerges from the orb and attacks, but her father's ghost protects her. InuYasha destroys the grandfather's ghost and breaks the orb with Tetsusaiga, which becomes stronger. | |||||
| 23 | Two Brothers, One Enemy | November 17, 2001[26] ISBN 4-09-125643-0 | October 4, 2005 ISBN 1-4215-0024-8 | ||
| |||||
| Naraku takes Rin hostage to make Sesshomaru kill InuYasha; instead, Sesshomaru goes after Naraku. InuYasha's group catches Naraku's scent and also closes in, but splits up when Kagome detects the jewel shard embedded in Kohaku, who is guarding Rin.
Naraku says that he lured in Sesshomaru to be devoured, and they fight. InuYasha uses Tetsusaiga to cut through the spiritual barrier around Naraku's new castle; Naraku sends Kagura to stop him, but also sends demons and saimyosho to watch her. As InuYasha destroys Naraku's demons, Kagura makes a pretense at fighting him and flees. As severed pieces of Naraku's flesh engulf Sesshomaru, InuYasha disintegrates most of Naraku's body with Tetsusaiga. Telling them that Kohaku will kill Rin, Naraku dissolves into smoke. Before Kohaku can kill Rin, Sesshomaru finds them; InuYasha knocks down Kohaku to save his life from Sesshomaru. Kohaku escapes with Kagura. Miroku surprises Sango by comforting her about Kohaku without groping her, but when she mentions this, Miroku pats her breasts. She slaps him. InuYasha visits Kagome in modern Tokyo while she is trying to study for an exam and upsets her by running naked out of a hot shower. Curry rice is also too hot for him. After InuYasha hogs the bed all night, they go back to the feudal era. The small leftover fragments of Naraku under his castle combine into a giant hair-ball demon with a mouth. As Koga and InuYasha argue, the hair-ball comes after their jewel shards. Koga grabs Kagome and carries her to safety as InuYasha fights the hairball, but it breaks away and goes after them, saying that Naraku is going where no one can touch him. Koga rips the hair-ball apart and leaves. Kikyo's soul collectors can find no trace of Naraku's aura. A dying elderly bandit asks her to take his top-knot to Mount Hakurei so its spiritual purification can wipe away his sins. InuYasha's group meets an old incompetent exorcist who leads them to a haunted castle whose lord seems possessed and kills any servants who approach his quarters. At night, an ogre's head appears in the sky above the castle but their attacks go through it without effect. | |||||
| 24 | Liars and Ogres and Monkeys...Oh, My! | December 18, 2001[27] ISBN 4-09-125644-9 | January 10, 2006 ISBN 1-4215-0186-4 | ||
| |||||
| Miroku realizes that the apparition in the sky is an illusion distracting them from the real ogre, whose head was buried in an underground chamber that the castle's princess shows him. The ogre's escape turned the burial mound into a pit now filled with the remains of unsuccessful exorcists.
The castle lord assumes the ogre's form to fight with InuYasha; however, the princess is the real ogre in disguise and intends to devour Miroku as the 100th victim since its escape, yielding enough spiritual power to restore its entire body. The ogre's paralyzing aura does not affect the old exorcist, who uses all of her purification salts to help Miroku break the spell on himself and Sango. Meanwhile, the ogre goes upstairs to the real princess's dead body, which Kagome has found and where the souls from its previous victims are stored. It eats some of the souls and tries to get Kagome's jewel shards. InuYasha realizes he has been tricked and goes inside the castle. The ogre explains that it waited to escape from the mound because of hiding from Naraku, who wanted to absorb it but is now gone. InuYasha injures the ogre with the wind-scar and Miroku sucks her into his wind tunnel. Addressing InuYasha as "venerable dog god", some men beg him to save their village from rampaging monkeys. When he finds and defeats three monkey sprites, they give him a so-called peace offering: a stone that attaches itself to his hand and grows into a huge boulder. InuYasha manages to lift the boulder and threatens to crush them. The monkeys tell Kagome they're searching for the missing stone that houses the monkey god, who is the only one who can release InuYasha. They return to the village and search for the stone. Kagome realizes the monkey-god's stone is being used to weigh down vegetables in a pickling vat. The villages promise to build a new shrine to the monkey god, who releases InuYasha. The monkey god says that Naraku's aura recently passed nearby toward the northeast, but suddenly disappeared instead of fading into the distance. A dying wolf tells Koga about a terrible demon-devouring ghost in the north. This "ghost" is a giant human resurrected by a jewel shard in his forehead: Kyokotsu, a member of the Band of Seven. When Kohaku warns Kyokotsu of Koga's approach, Kyokotsu attacks Kohaku and tries to take his shard. Kohaku fights him off and leaves before Koga arrives. Koga takes Kyokotsu's forehead shard, returning him to bones, but saimyosho steal the shard from Koga. Kohaku warns Jakotsu, another member of the Band of Seven, of InuYasha's approach. Jakotsu, a homosexual sadist, uses a hinged multisection "snake bone" sword against InuYasha and is offended by Sango, a woman, daring to interfere. Jakotsu fights InuYasha alone while Mukotsu, another of the Band of Seven, deals with the other members of InuYasha's group. Mukotsu's poison paralyzes Kagome. | |||||
| 25 | The Battle with the Band of Seven Rages On! | March 18, 2002[28] ISBN 4-09-125645-7 | April 18, 2006 ISBN 1-4215-0383-2 | ||
| |||||
| Shippo fetches InuYasha away from the fight with Jakotsu. Mukotsu strangles Kagome, disabling Miroku and Sango with his poisons. Immune to the poisons, Sesshomaru saves Kagome by cutting off Mukotsu's arm and killing him with one blow from Tokijin. Sesshomaru asks them about Naraku's whereabouts, then leaves. A saimyosho takes Mukotsu's shard, but InuYasha chooses to stay with his friends rather than try to follow it to Naraku. Jakotsu observes all of this from a distance and reports to Renkotsu.
InuYasha's group looks for somewhere for Kagome, Sango, and Miroku to recover. InuYasha sends Shippo ahead with the others, but Ginkotsu attacks Kirara as she carries them to a temple. Inuyasha's wind scar opens a chasm in the ground that engulfs Ginkotsu. When InuYasha reaches the temple, the "chief priest" Renkotsu (who killed and buried the real priests) questions him about Naraku, but Ginkotsu interrupts to resume the fight. Renkotsu takes Kagome's shards, burns the temple, and uses fire to help Ginkotsu. Myoga, Shippo, and Kirara are also immune to Mukotsu's poisons, but they cannot pull their human friends to safety. InuYasha cuts Ginkotsu in half and runs past Renkotsu, who flees as saimyosho collect Ginkotsu's body. InuYasha carries his friends out of the temple, but they stop breathing until Myoga sucks the poisons out of their blood. Jakotsu attacks Koga and taunts him that Kagome is already dead. Koga breaks off and heads for the temple, where he accuses InuYasha of leading her to the "brink of death". Kikyo finds Doctor Suikotsu healing people in a village near Mount Hakurei. Surprised that a member of the Band of Seven is apparently a good man with a pure jewel shard, Kikyo helps him cure people at his clinic. InuYasha attacks the seemingly innocent doctor and is interrupted by Ginkotsu, Renkotsu, and Jakotsu attacking the villagers. When the doctor protests their actions, Jakotsu attacks him while Ginkotsu and Renkotsu take on InuYasha's group and Kikyo. The doctor transforms into Suikotsu of the Band of Seven, tainting his jewel shard. As Suikotsu fights InuYasha, Miroku saves Kikyo from Ginkotsu. When the children plead with Suikotsu, the other members of the Band of Seven drag him away to keep him from transforming back into the kindly doctor. At Kagome's suggestion, InuYasha carries Kikyo away from Mount Hakurei so that her soul collectors can revive her. | |||||
| 26 | The Sacred Mountain | June 18, 2002[29] ISBN 4-09-125646-5 | July 18, 2006 ISBN 1-4215-0466-9 | ||
| |||||
| Kikyo and her soul collectors cannot approach Mount Hakurei, but InuYasha's group goes to investigate it. Because of the way the mountain's purifying barrier affects demons, half-demons, and even Miroku (for his occasional vices as a lecher and con-man), they decide that Naraku cannot exist inside the barrier.
The entire Band of Seven attacks the castle of the lord who originally executed them. The band's leader, Bankotsu, uses his halberd, Banryu, to kill the castle's occupants, drawing InuYasha with the scents of blood and smoke. By the time InuYasha arrives, Koga is already there fighting the Band of Seven. Bankotsu has three jewel shards in his neck: his own, Kyokotsu's, and Mukotsu's. Renkotsu already stole Kagome's shards earlier, but targets her again to keep Bankotsu from finding that out. Rin follows Kohaku through the purifying barrier (where Jaken cannot follow) to a cave full of Naraku's demons; Kohaku warns Rin to leave before they tear her apart. Rin tells Sesshomaru that Kohaku saved her from Naraku's demons. Naraku orders the Band of Seven to retreat. InuYasha's group pursues them, but is blocked by a demon puppet that has a strange purity instead of Naraku's normal aura. InuYasha destroys the puppet and the group continues its pursuit, but Koga is blocked by the purifying barrier. Kohaku and Kanna give new orders to the Band of Seven. Kanna suggests using Renkotsu's stolen shards to strengthen Banryu, increasing the distrust and rivalry between Renkotsu and Bankotsu. InuYasha's group find a place with the same scent as the strange demon puppet: Hijiri Island, where Bankotsu is waiting at the ransacked tomb-shrine of Saint Hakushin. Hakushin's body is gone, but his dokko (the magic tool used during his lifetime) still emits a purifying aura until Miroku neutralizes it, allowing InuYasha to use the wind-scar. Banryu blocks the wind-scar and the dokko re-energizes, reducing Tetsusaiga to a normal sword, then teleports itself and Bankotsu away to another temple where the saint waits with Kohaku and Kanna. InuYasha's group decide that the saint is helping Naraku and they return to the mountain. Miroku and Sango enter the barrier while the others wait outside. Kikyo notices that the barrier is getting stronger and thicker. Renkotsu and Ginkotsu ambush Koga. | |||||
| 27 | The Unlikely Allies | September 18, 2002[30] ISBN 4-09-125647-3 | October 17, 2006 ISBN 1-4215-0467-7 | ||
| |||||
| Koga stuffs some of Renkotsu's armor into Ginkotsu's artillery; the resulting explosion kills Ginkotsu and wounds both Renkotsu and Koga. Renkotsu flees with Ginkotsu's shard, using it to heal himself.
Suikotsu and Jakotsu take Rin as a hostage, hoping to lure Sesshomaru to his death. As Sesshomaru fights both of them, Kikyo fires a sacred arrow into Suikotsu to revert him to Doctor Suikotsu, who pleads for death to stop his killing spree. Kikyo is about to remove his repurified shard when Jakotsu cuts it out and flees into the barrier with it. Suikotsu disintegrates. Except for Miroku and Sango, who are inside the barrier, InuYasha's group brings Koga to a cave to recover. Renkotsu sets the river on fire to drive them from the cave. InuYasha gives his cloak to Kagome and leaps over the river, but Renkotsu hits him and Kirara with cannon blasts and fires a third blast into the cave. When Renkotsu enters, Kagome and the others seem dead at first, but they were shielded by InuYasha's cloak. Having lost his cannon, Renkotsu pulls out fire sticks (dynamite) and lights the fuses. InuYasha pushes Renkotsu out of the cave and both of them fall towards the river with the fire sticks, which explode. Thinking InuYasha is dead, Kagome starts crying; Koga tries to comfort her by saying it wasn't her fault, it was InuYasha's. InuYasha reappears and fights with Koga about Kagome despite both of them ignoring her as she pulls herself together. Miroku and Sango notice that the purification does not extend all the way into a cave, letting them sense Naraku's aura. Inside the mountain, Kagura attacks with some saimyosho that keep Miroku from using his wind tunnel, though he can still use sacred sutras while Sango uses her boomerang. When Kagura separates them and knocks out Sango, Miroku leaps across the gap to reach Sango and opens his wind tunnel, saying that he would rather die from the saimyosho than leave her to be killed. Miroku tries to carry Sango, but collapses from the saimyosho's venom. Renkotsu, who threw away the fire sticks at the last moment, emerges downstream and encounters Bankotsu. Jakotsu gives Suikotsu's shard to Bankotsu who says that he's the only one he trusts. Reluctantly leaving Kagome in Koga's care, InuYasha enters the mountain alone in search of Sango and Miroku. When InuYasha reaches the barrier's limit for a half-demon, Renkotsu blasts him further in with his cannon, hoping to kill him; instead, InuYasha transforms into his human form (even without the new moon) and runs into a cave. Renkotsu sends Jyakotsu in after him. Miroku tells Sango to go on by herself, but she cries and says that she would rather stay and die with him. They realize they have crossed back into the purifying barrier, preventing Naraku's demons from finishing them off; Miroku also recovers from the saimyosho venom. They find the temple containing the mummified "living Buddha", Saint Hakushin, who turns out to be alive. | |||||
| 28 | The Rebirth of Naraku | December 5, 2002[31] ISBN 4-09-125648-1 | January 16, 2007 ISBN 1-4215-0468-5 | ||
| |||||
| Saint Hakushin says that his soul was in darkness for a long time before he was rescued by Naraku, which is why he is helping him now despite knowing that he is the vilest of demons. Miroku uses his wind tunnel until the temple begins to disintegrate, but the reappearance of saimyosho lets Hakushin escape with just a small spiritual shield around him.
Because of his human form, InuYasha is losing to Jakotsu, who wants to kill him slowly to make him plead and scream. The purifying barrier weakens, letting InuYasha transform back into a half-demon; leaving Jakotsu crippled, he goes after Naraku's strengthening aura. Renkotsu takes Jakotsu's shard, killing him. The saimyosho report this to Bankotsu, who kills Renkotsu and blocks InuYasha's path to Naraku. InuYasha cuts Bankotsu in half. Kikyo shows Hakushin how Naraku deceived him. His soul at peace, Hakushin ascends to Heaven and drops the entire barrier. Without it, Naraku's evil aura pours out of the mountain and many of his demons escape. Kagura drops Miroku and Sango deep into the mountain, where they find the remains of some baby-like creations of Naraku. Koga, Kagome, Shippo, and Kirara enter the mountain looking for the others. The rock of the mountain turns into flesh, dripping acid onto Kagome and enveloping both InuYasha and Koga. Naraku's head appears, saying that the mountain is now his body and they are all in his bowels, though he is not interested in digesting them. He takes all of the jewl shards to complete the transformation to his new and vastly more powerful form. InuYasha's wind-scar just bounces around inside the mountain and Naraku says that it will only kill InuYasha and his friends. | |||||
| 29 | Naraku's Perfect New Form | March 18, 2003[32] ISBN 4-09-125649-X | April 10, 2007 ISBN 1-4215-0900-8 | ||
| |||||
| Naraku traps InuYasha's wind-scar into bouncing around inside Mount Hakurei to eventually reduce InuYasha's group to mince-meat. Seeing Kagura leaving the mountain with an infant, Kikyo narrowly misses them with a sacred arrow. The infant stops Kagura from fighting back.
Kagome shoots a sacred arrow at Naraku to break his control of the wind-scar and free Koga. Naraku collapses Mount Hakurei onto InuYasha's group, hoping to crush them. Miroku and Sango escape on Kirara, Kagome on Shippo, and InuYasha saves Koga, but Naraku kills Kikyo and dissolves her body in a river of miasma. Sesshomaru slices Naraku into bits, but his body just re-assembles and hurls the force of Sesshomaru's attack back at him. Naraku leaves. InuYasha accuses Sesshomaru of letting Kikyo die, but Sesshomaru says InuYasha is the one who failed to save her from Naraku, who finally succeeded in removing his human heart so he could kill Kikyo. InuYasha searches for Kikyo's remains, but cannot find any. The group meets a monk who says that he saw Kikyo; InuYasha leaves to search for her again. When soldiers attack the rest of the group, Shippo and Kirara escape to fetch InuYasha, but the others are captured. The monk turns out to be a corpse animated by Kagura's dance of the dead. Kagura still has the infant, who searches Kagome's soul and tries to control her with her jealousy of InuYasha and Kikyo. InuYasha defeats the soldiers, but Kagura carries Kagome away, hoping to make her find more jewel shards. Kagura is unable to embed a tainted shard into Kagome before InuYasha rescues her, but his wind-scar reflects back at him from a shield around Kagura, Kanna, and the infant. InuYasha and Kagome argue about Kikyo and Kagome returns home. Naraku finds out that the last jewel shard is in the netherworld. InuYasha goes to modern Tokyo and brings Kagome back to the Feudal Era. A village of women worships a hanging picture scroll that flays men, whose skinned bodies the women dump into a river. InuYasha's group meet Shinosuke in search of his missing fiancee, Wakana. The village of women falsely denies having Wakana but invites the group to stay the night, separating the women (Kagome, Sango, Kirara) from the men (InuYasha, Miroku, Shippo, Shinosuke). The picture scroll tells Wakana to bring Shinosuke to its shrine. | |||||
| 30 | A Hideous Demon Baby's Mission | May 17, 2003[33] ISBN 4-09-125650-3 | July 10, 2007 ISBN 1-4215-0900-8 | ||
| |||||
| When Kagome asks if she likes Miroku, Sango's overly vigorous denials reveal her jealousy. Kagome says that Miroku treasures Sango, just as Miroku walks by with a village woman whom he is offering to "comfort". Later that night, the women of the village file past, Sango puts on her armor and follows them despite Kagome's suggestion to summon InuYasha and Miroku first. InuYasha and Kagome try to catch up with Sango, who reaches a lake where the women have apparently disappeared until they reach out of the water and drag Sango under.
The village woman and Miroku are in the picture scroll's shrine, engaging in foreplay until he is attacked by a salamander demon who was skinned and sealed into the scroll. Naraku allowed it to escape, but it needs the skins of men to restore its normal form and is controlling the village women via its eggs in their stomachs. Just outside the shrine, Wakana breaks through the control long enough to tell Shinosuke to run. Miroku injures the demon and it flees towards the lake. He punches the two women to drive the demon's eggs out of their stomachs and free them from its control. At the lake, Miroku joins InuYasha and Kagome fighting against the village women and the demon. InuYasha kills the demon, but the women keep fighting. Miroku and Kirara go into the lake to find Sango, who has been possessed by an egg and injures Miroku several times before he can punch her stomach and release her. InuYasha and Kagome destroy the other eggs. Shinosuke and Wakana return to their home village. Miroku proposes to Sango; she accepts, agreeing to have as many children as he wants, and asks him to stop chasing other women. He does not answer. Kagura takes Naraku's infant to various priests. She kills them and the infant interrogates their spirits about the afterlife. One priest cuts the infant in half, forming Akago and Hakudōshi. Kagura takes the two seemingly dead halves to Kanna, who takes Akago and tells Kagura to care for Hakudoshi. That priest's death releases a flying horse demon, Entei, whom he had imprisoned. When Hakudoshi revives, now aged to a child, Entei carries him through the air and breathes fire at InuYasha's group. Hakudoshi blocks InuYasha's wind-scar with his spiritual barrier, telling them that he was Naraku's infant and saw a jewel shard in the afterlife. Hakudoshi takes a nagamaki to behead demons, using their heads to see into the afterlife, but loses the head of an otter demon when it washes away. The otter's son recovers the head and InuYasha's group helps him find his father's body. Kagome, Shippo, and Tenseiga convince Sesshomaru to revive the otter demon, who tells them about his experience in the afterlife. InuYasha and Kagome recognize the place in the afterlife as the grave-site of InuYasha's father. Myoga tells them to ask an oyster demon, Hosenki, for a pearl which can link this world and the next. Hosenki's son says that his father died of old age and it will take the son 100 years to make a pearl for them. The saimyosho tell Hakudoshi about another path. He has Kagura tell InuYasha about the gate in the realm of fire, but not that InuYasha will die forcing the gate open so Hakudoshi can go through. | |||||
| 31 | The Demon of the Birds | July 18, 2003[34] ISBN 4-09-126661-4 | October 9, 2007 ISBN 1-4215-0902-4 | ||
| |||||
| InuYasha's group follows the saimyōshō to the fire realm's gate to the afterlife. Two giant statues, Gozu and Mezu, guard the gate and try to kill him because the living are not allowed to cross over. InuYasha breaks the chain that holds the gate closed. Kagura and Naraku's demons try to pass through the open gate ahead of him; the demons are petrified by the light from the other side, but Kagura escapes. Kagome senses the missing jewel shard beyond the gate which closes again, stilling Gozu and Mezu. Kagura cuts Hakudoshi in half for sending her to test the gate and probably die, but Hakudoshi regenerates and Naraku punishes Kagura with a heart-attack. InuYasha's group looks for another path to the afterlife.
The bird-demon Princess Abi orders her flock to collect human blood for an antidote to the poison her mother swallowed. Naraku lends her a trident made from his bones, which generates a protective barrier around her. InuYasha's group pass through many villages whose inhabitants have been drained of blood. They finally reach a surviving village, where the bird demons ignites the houses to drive the people out from shelter. Miroku uses his wind tunnel, but saimyosho force him to stop. Princess Abi attacks InuYasha's group; he counter-attacks with the wind scar, but the trident saves Princess Abi. She flees. Looking for Sesshomaru, Kagura approaches Rin and Jaken. Jaken says that if Sesshomaru were present, he would kill her. She agrees and leaves, deciding to find and kill Akago in order to kill Naraku. Kanna gives Akago to a noble lady in place of the lady's stillborn child. The bird demons's nest is hidden by a spiritual shield made by Naraku. InuYasha's groups encounters refugees traveling to the village of a holy woman who can protect them from the bird demons. The holy woman's whole body is veiled and she communicates through her assistants, Kocho and Asuka. InuYasha's group is attacked by some bird demons backed up by Kagura, Hakudoshi, and Entei, but they realize that this is a diversion while Princess Abi and the main force of bird demons attack the holy woman's village. Hakudoshi's barrier deflects InuYasha's wind scar until the holy woman appears and breaks the barrier with a sacred arrow, allowing the wind scar to kill Entei and wound Hakudoshi. Kagura flees with Hakudoshi. The holy woman disappears; although she does not have the same scent, but InuYasha's and Naraku's groups both suspect that she is Kikyo. At the village, Princess Abi and the bird demons are held at bay by a spiritual shield, which Asuka tells the villagers to stay inside even when the demons cover the shield with fire. The holy woman returns, kills the bird demons with a sacred arrow, and pursues Princess Abi when she flees. InuYasha's group hear what happened at the village and look for the holy woman, figuring that Naraku will try to kill her. Kocho and Asuka take soil from Kikyo's grave, fly to the forbidden mountain, and pour it into a pool at the base of a waterfall. Naraku's demons come to the mountain; some of them are destroyed by a sacred arrow from the holy woman and the rest fight with InuYasha's group. When InuYasha meets the holy woman. Kocho and Asuka tell him that she is dying from Naraku's miasma and cannot speak. After cutting down the holy woman, who appears to be Kikyo's spirit but dissolves away, Kagura says that the sacred arrows were smeared with soil from Onigumo's cave to make them toxic to Naraku and his incarnations. Kagome follows soul collectors to the waterfall, where she sees Kikyo's body in the pool. Kocho and Asuka tell Kagome that she is the only one who can save Kikyo. | |||||
| 32 | River of Blood | September 18, 2003[35] ISBN 4-09-126662-2 | January 8, 2008 ISBN 1-4215-1522-9 | ||
| |||||
| Kagome purifies the miasma and allows Kikyo to heal, but she leaves without thanking Kagome, who blames InuYasha for her own anger.
Princess Abi and her mother attack the castle where Akago is hidden. InuYasha's group arrive and help Kohaku defend the castle. Princess Abi and her birds escape with the blood of most of the castle's inhabitants. Under Naraku's orders, Kohaku kills the people around Akago, whom Kanna takes away. Sango confronts Kohaku before Kagura carries him away; he remembers everything and secretly decides to kill Naraku. Kagura realizes that Akago is Naraku's heart. Princess Abi's mother consumes enough human blood to recovers from her illness. Via InuYasha, Kikyo gives Kagome a special arrow which can destroy Naraku. By killing Princess Abi and beheading her mother, Naraku produces a river of blood that carries Naraku and InuYasha's group to the borderland between this world and the afterlife. Kagome sees the last shard of the sacred jewel in the remains of InuYasha's father. They are attacked with spears of diamond. Sesshomaru arrives too late to use the river of blood, but Kagura directs him to the gate in the realm of fire. | |||||
| 33 | Allies and Enemies | December 5, 2003[36] ISBN 4-09-126663-0 | April 8, 2008 ISBN 1-4215-1828-7 | ||
| |||||
| Myoga introduces the late Hosenki, source of the diamond spears. InuYasha fights Hosenki for the last shard of the sacred jewel, but Naraku takes it.
Sesshomaru arrives at the gate in the realm of fire and fights with Gozu and Mezu. Tenseiga forces them to submit and open the gate, allowing Sesshomaru to pass through to the afterlife and fight with Naraku. When InuYasha defends his comrades at risk to himself, Hosenki helps by giving him the power to create diamond spears, or "adamant barrage", which destroy Naraku's barrier. Kagome fires the special arrow at Naraku as he disappears. Sesshomaru and InuYasha's group return from the afterlife through the gate. As Naraku reconstitutes himself in the world of the living, the arrow misses him and hits Hakudoshi, who survives because Akago also contains his heart with Naraku's. Naraku orders Hakudoshi and Kohaku to force Kikyo into the open to be destroyed. Hakudoshi and Kohaku kill a giant demon rat and open the rat's shrine, releasing an unending stream of demon rats that devour all living things in their path. Kikyo creates a demon tree to lure in and purify the demon rats; she escapes before Hakudoshi can kill her. InuYasha and Kagome find the tree. Miroku and Sango find Kohaku in the shrine. | |||||
| 34 | A Mountain That Lives | February 18, 2004[37] ISBN 4-09-126664-9 | July 8, 2008 ISBN 1-4215-1829-5 | ||
| |||||
| Kohaku, still pretending to be amnesic, protects the shrine from Miroku and Sango's attack. Meanwhile, Hakudoshi attacks the demon lure tree with giant slugs. Inuyasha and Kagome kill the slugs, but the tree is blighted and the lure nullified. The shrine rats return to devastating the countryside. Inuyasha and Kagome find the shrine where the rats are now swarming Miroku, Sango and Kohaku. A timely arrow from Kikyo allows Inuyasha to destroy the shrine with Tetsusaiga, and the rats disintegrate. Kohaku runs off.
Later, while Inuyasha discusses Kikyo with Kaede, Kagome returns to the future without telling him. Miffed, Inuyasha follows her where he accidentally destroys her bicycle and meets her friends. They think he's cool. Inuyasha and Kagome return to the past in time to be victimized by Shippo's malicious pranks. He's been possessed by a parasitic nymph demon. Inuyasha scares the nymph off of Shippo who recovers. The gang follows the nymph back to its original host, Gakusanjin, a giant demon in the shape of a forested mountain. Gakusanjin was awakened from a 200 year slumber when Naraku stole Gakusanjin's nulling stone, an artifact that hides demonic auras. To help recover the nulling stone, Gakusanjin gives the group a fistful of crystals that fade when the stone is nearby. Kagura secretly observed this exchange, and acquires a few excess crystals. On his way to find Kanna, Kohaku meets Kikyo. Kagome senses the shard in Kohaku and directs the group to his position. Meanwhile, Naraku suddenly appears and attacks Kikyo. The group arrives in time to foil his attack. Kagura collects Kohaku. All now realize the strategic significance of the nulling stone, which Naraku gives to the infant. Hakudoshi and Kohaku team up to kill a demon that eats haku (life force). Later, Koga starts finding demon corpses and battles a demon that is patched-together from different bodies. | |||||
| 35 | Almost Human | May 18, 2004[38] ISBN 4-09-126665-7 | October 14, 2008 ISBN 1-4215-1830-9 | ||
| |||||
| Inuyasha, Kagome, Miroku, Sango, Shippo and Kirara arrive as Koga defeats a demon patched together from different corpses and is powered by haku. As they travel, the group battles patched-together demons that are increasingly more human in appearance. The group finally encounters Hakudoshi and Moryomaru, his latest amalgamation. A battle ensues. The battle ends after Moryomaru steals from Miroku the crystals that can detect the nulling stone. Koga leaves. Kagura finds Sesshomaru and leaves one of her crystals to help him find Naraku's heart.
Inuyasha and the group shelter at a home where two years ago, Miroku promised to marry Shima, the homeowner's daughter. Shima's been promised to the lake guardian in exchange for healing her illness. Shima pretends that Miroku and she consummated a relationship—the deception is to avoid marrying the lake guardian who wants a “pure” bride. Sango is upset and jealous. The guardian changes to his true form as a catfish demon. He tries to abduct Shima but is foiled by Sango. He then tries to abduct Sango. Miroku saves her, and Sango realizes that Miroku has strong feelings for her after all. Traveling on, the group encounters the corpse of Gakusanjin, the mountain demon. He's been killed by strange lights. The group encounters three boys carrying unusual urns which contain demons that take on the form of killer light rays. The group follows the children back to an unsettling temple where they meet Goryomaru. He is a priest whose right arm was replaced by a misshapen demon that is the source of the children's lights. After night falls, the temple is attacked by demon corpses created by Kagura. | |||||
| 36 | A Question of Time | July 16, 2004[39] ISBN 4-09-126666-5 | January 13, 2009 ISBN 978-1-4215-2218-0 | ||
| |||||
| Kagura storms Goryomaru's temple, using demon corpses as her strike force. Goryomaru grabs Kagome, and strengthened by the shard she carries, fires his light rays at Kagura. He blasts a hole in Kagura's chest. Severely injured, Kagura breaks off the attack. She flies away and collapses in a stream near Sesshomaru who callously ignores her plight. Little Rin attempts to rescue her but is swept away by the rushing water. Jaken tries to help, but eventually, Sesshomaru has to save all three. Kagura heals and tells him the location of Goryomaru's temple where she now knows the infant was hiding.
Kagura returns to the temple with Hakudoshi who begins battling Goryomaru. Inuyasha and the gang arrive to witness Hakudoshi behead Goryomaru. Kanna and the infant appear, and Hakudoshi covers their retreat. Kagura follows and allows the Inuyasha and the gang to discreetly trail her. The group enters an ogre-shaped cave. Naraku appears and tries to take the shard Kagome is carrying. The ogre-shaped cave comes alive. Miroku tries to destroy Naraku with the wind tunnel but is poisoned by the saimyosho, Naraku's demon wasps. Naraku leaves, and the group is stuck in the belly of the ogre who is beginning to digest them. Inuyasha tries to blast out using diamond spears, but Naraku has strengthened the walls. Desperate, Inuyasha takes the shard from Kagome and embeds it in Tetsusaiga. The evil aura from the ogre taints the shard and then flows into Inuyasha. He turns into full-demon form. Before Inuyasha can go on a rampage, Kagome flings her arms around him and purifies the tainted shard. Despite the acid burning her legs, Kagome holds onto Inuyasha, who still in full-demon form but clear-eyed and clear-headed, is able to use enhanced diamond spears to break out of the ogre's belly. Meanwhile, Kikyo meets Kanna who is fleeing with the infant. A surprise attack from Moryomaru prevents Kikyo from killing the infant. Naraku gives Kagura the task of guarding an imprisoned and very-much-alive Goryomaru. The group follows rumors of a traveling medicine man who has a potion that counteract all poisons. This traveler is reputed to be “the most handsome man ever met,” but seems to prey on women. Sango and Inuyasha set off to investigate. The traveler intoxicates Inuyasha and puts Sango under spell to drink her blood. Sango comes out of the spell, and contends with the man and a jealous Miroku. However, she allows the man to bite her in exchange for the magic potion which would help Miroku. Unfortunately, the man is a possessed mosquito, and the magic potion is a lie. | |||||
| 37 | A Question of Time | September 17, 2004[40] ISBN 4-09-126667-3 | April 14, 2009[41] ISBN 978-1-4215-2219-7 | ||
| |||||
| Sent to find the demon Hitoukon, who can merge with weak forms and control them, Kohaku is injured and lets the Hitoukon escape. A father and son invite Kohaku to stay for the night, but the Hitoukon takes over the son's body. Kohaku remembers being manipulated into killing his own father, and wants to save the boy. Inuyasha's group chases after the Hitoukon and expels it. While Inuyasha takes care of the boy, Kohaku meets Sango again, but runs away to keep anyone from finding out that he is acting for himself. Hakudōshi convinces Kagura to let Goryomaru escape from a castle, against her orders from Naraku. While Sango and Miroku are lured away by rumors about bandits, Goryomaru finds Kagome and Shippo hiding with InuYasha in his new-moon human form. He takes their jewel shard and absorbs it, then shows his true identity as Mouryoumaru, now with a soul and the ability to absorb youki (demon power). Sesshomaru appears with Jaken, who tells him that their crystal for detecting Naraku's heart shows no youki. Sesshomaru refuses to say where he got the crystal, but Mouryoumaru realizes that it came from Kagura and tells her to bring him Kohaku's shard or be absorbed herself. Hakudōshi is also seeking the shard as part of the plot to replace Naraku with Mouryoumaru. Kagura lends a flying plume to Kohaku so he can escape. | |||||
| 38 | A Heart in the Hand | December 10, 2004[42] ISBN 4-09-126668-1 | July 14, 2009 ISBN 978-1-4215-2220-3 | ||
| |||||
| Inuyasha, Kagome, Miroku, Sango, and Kagura battle Hakudoshi. Meanwhile Naraku commands his Saimyosho to come back to him and he breaks Hakudoshi's barrier allowing Miroku to suck up Hakudoshi in his wind tunnel! Kagura tells Inuyasha and his group about the location of Naraku's heart, which is inside Moryomaru. Later, Naraku confronts Kagura offering her freedom. Naraku then returns her heart, only to stab his tentacles into her and put miasma in her body. Meanwhile, Sango goes after Kohaku but finds Moryomaru instead! Kohaku oversees this battle and joins in. Inuyasha, Miroku, and Kagome arrive and Moryomaru retreats. Sango then figures out that Kohaku has his memories back, as Kohaku escapes as well! As Kagura is dying, Sesshomaru arrives before her. Kagura then dies peacefully, stating that she is as free as the wind. While Inuyasha and the group rest, Kikyo takes the priestess Midoriko's soul. Inuyasha confronts her and she states that Naraku can only be defeated by the Shikon Jewel itself. Kohaku then leaves with Kikyo determined to finish off Naraku. | |||||
| 39 | The Struggle Continues | February 18, 2005[43] ISBN 4-09-126669-X | August 11, 2009 ISBN 978-1-4215-2221-0 | ||
| |||||
| Koga of the demon wolf tribe comes in contact with the arm of Moryomaru that had killed the entire snake demon clan. Inuyasha, Kagome, Miroku, Sango, and Shippo all arrive in time to help Koga, but the arm retreats. Koga then decides to retrieve a weapon in the sacred burial grounds of the wolf demon clan. But, a three headed stone wolf attacks Koga. Eventually, the stone wolf assaults Koga's comrades forcing Koga to save them rather than retrieve the weapon. But, in that act of courage the spirits of the wolf demon clan give him the Goraishi, a claw like weapon that can produce lighting. The spirits also said that they can protect Koga from the will that taints the shards in his legs only once. Later, Shippo comes in contact with a girl named Mujina who wields a blade that can absorb demon energy. Inuyasha's tensaiga's demon energy is stolen only to be returned after he defeats Mujina. Mujina really turns out to be a tanuki disguised as a human. Inuyasha and the group find a man named Toshu who is being hunted by a demon named Ryujin. Ryujin eventually attacks Inuyasha in hopes of taking back a sword called Dakki that was made from one of his scales. Inuyasha easily defeats Ryujin, only to be surprised when Toshu stabs Dakki into Ryujin and it absorbs his demon energy! | |||||
| 40 | The Fate of a Sword | May 18, 2005[44] ISBN 4-09-126670-3 | September 8, 2009 ISBN 978-1-4215-2890-8 | ||
| |||||
Volumes 41–56
| No. | Title | Japanese release | English release | |
|---|---|---|---|---|
| 41 | Armor of a Demon | August 8, 2005 ISBN 4-09-127321-1 | October 13, 2009 ISBN 978-1-4215-2891-5 | |
| ||||
| Tetsusaiga's new ability to absorb youki is too much for InuYasha's half-youkai body to handle and will eventually backfire on him.
Mouryoumaru's flesh resurrects a Meioujuu, which said to have the strongest armored shields, to attack a castle that contains armor made from one of its shields. It absorbs the armor, becoming strong enough to repel InuYasha's adamant barrage when the group fights it. Mouryomaru absorbs the Meioujuu and gains its powers. InuYasha's group goes with Sesshomaru, Kikyo, and Kohaku to face Mouryomaru's new body. Mouryoumaru taunts Sesshomaru about Kagura's death and Tokijin breaks against Mouryoumaru's body. Kikyo's arrow and the dragon-scaled Tetsusaiga force Mouryomaru to withdraw. | ||||
| 42 | Mixed Messages | October 18, 2005 ISBN 4-09-127322-X | November 10, 2009 ISBN 978-1-4215-2892-2 | |
| ||||
| Totosai appears in front of Sesshomaru, saying the Tenseiga called him, Totosai gives Tensaiga the power of Meidou Zangetsuha, which can cross paths between the realms of life and death.
During InuYasha's new-moon human phase, the group is attacked by the youkai Nikosen, who can survive decapitation. At sunrise, Tetsusaiga absorbs Nikosen's power, preventing backfire from using the dragon scale. Kanna flees from Naraku to tell Mouryoumaru about Kinka and Ginka, two brothers that share the same youkai body; their power of shared blood would strengthen Mouryoumaru's armored shell. | ||||
| 43 | Demon Swamp | December 15, 2005 ISBN 4-09-127323-8 | December 8, 2009 ISBN 978-1-4215-2893-9 | |
| ||||
| Mouryoumaru absorbs Ginga, but Tetsusaiga absorbs Kinga, forcing Mouryoumaru to withdraw from the resulting resonance when Inuyasha attacks.
Tetsusaiga completely fails to work against the youkai lake Numawatari, but Sesshomaru finishes it with the Meidou Zangetsuha. Totosai tells InuYasha to recover Youreitaisei's innards, which will help him master the dragon scale Tetsusaiga without using the Nikosen's ability. While hunting the innards, Inuyasha learns about the Youketsu, youki whirlpools that have a relation with a youkai. | ||||
| 44 | Call of the Wolf Clan | February 17, 2006 ISBN 4-09-120088-5 | January 12, 2010 ISBN 978-1-4215-2994-3 | |
| ||||
| Inuyasha's youkai opponents turn out to be an illusion from Youreitaisei for his training.
A Byakuya's youkai captures two brothers from Koga's clan, Kai and Shinta. The youkai use Kai to draw out Koga with an embedded jewel shard. Koga saves Shinta and exterminates the Byakuya's youkai with the power of Goraishi. InuYasha's group fights Mouryoumaru, who takes Kai's shard and flees from InuYasha's new ability to cut youketsu. Because of the condition of his legs, Koga decides to join InuYasha's group and leave the two brothers with his companions. | ||||
| 45 | Triple Threat | May 18, 2006 ISBN 4-09-120350-7 | February 9, 2010 ISBN 978-1-4215-2995-0 | |
| ||||
| Naraku uses a jewel shard to revive and absorb Youmeiju, a tree that destroys barriers and absorbs youkai.
Koga meets Kikyo who tries to take his Shikon fragments Koga fights despite knowing that because of Midoriko's will, his legs won't move in battle. Mouryomaru absorbs Naraku, merging the Shikon jewel inside, and takes the shards from Koga's legs. Naraku reappears inside Mouryomaru and uses the Youmeiju's ability to absorb Akago, Naraku's heart. The Yourouzoku's elders help Koga escape at the last moment, exposing Naraku's heart. Miroku tries to consume it with the wind tunnel, even at the price of his life, but Inuyasha stops him and Naraku runs away. Kikyo purifies the miasma inside Miroku's body. | ||||
| 46 | Lost Love | July 18, 2006 ISBN 4-09-120558-5 | March 9, 2010 ISBN 978-1-4215-2996-7 | |
| ||||
| Naraku's Kongosouha spears are controlling the corpses of poisonous porcupine-demons. Miroku is still resting in Sango's care when they attack, but the rest of the group comes back to defeat the porcupines.
Naraku traps Kikyo, InuYasha, and Kagome with spiderwebs in the sky, worsening the miasma in Kikyo's body; Kagome cannot purify it because the webs have touched her own malice. InuYasha and Kikyo stay behind while the others search for a bow that can heal the miasma. Sesshomaru prevents Byakuya from catching Kohaku. Kagome and the others come to Mount Azusa, whose spirit tests her, breaks her malice, and gives her the bow to save Kikyo. | ||||
| 47 | Yin and Yang | November 17, 2006 ISBN 4-09-120680-8 | April 13, 2010 ISBN 978-1-4215-2997-4 | |
| ||||
| While Inuyasha fetches Kagome, Naraku's spiderwebs capture the rest of the group. The webs connect Naraku with Kikyo, who transfers the Shikon Jewel into her body so he can avoid purification when he gets Koga's leg shards. Kagome shoots a sacred arrow into Kikyo's chest, purifying the jewel and redirecting the power to Naraku, but Naraku escapes with the nearly-complete jewel and leaves Kikyo powerless and dying. InuYasha carries her away from the others so the two of them can talk about their past happiness. Finally at peace, she smiles at InuYasha, who kisses her before her body dissolves into orbs of light that the soul-collectors carry away. Koga leaves with his comrades. Sesshomaru visits his mother, seeking mastery of the full circle meidou. When she opens the meidou stone that Inuyasha's father entrusted to her, it releases a hellhound immune to Sesshomaru's attacks. It eats Rin and Kohaku and runs back into the meidou; Sesshomaru pursues it and cuts it in half to save them. The road to hell starts to collapse, forcing Sesshomaru's group toward hell. | ||||
| 48 | Feeding Frenzy | January 13, 2007 ISBN 4-09-120810-X | May 11, 2010 ISBN 978-1-4215-2998-1 | |
| ||||
| Kohaku survives because his life is bound with the jewel shard, but the darkness takes Rin. Tenseiga cannot revive her a second time, even when Sesshomaru attacks the master of hell. His fear of losing Rin opens the path between worlds and strengthens Tenseiga. Sesshomaru's mother uses her necklace to save Rin.
Inuyasha's group find a village plagued by Kaou, a youkai that consumes people's pain and suffering. Kaou reveals the unhappiness about Kikyo in InuYasha's and Kagome's hearts before they defeat him. Naraku orders Kanna to open her mirror near Inuyasha, forming a phantom copy of Tetsusaiga. InuYasha manages to retain full consciousness as his youkai blood takes over; when he smashes at the phantom mirror, Kanna takes the damage instead. Kanna creates a shadow circle to throw beams at Inuyasha. Inuyasha reflects the beams with Tetsusaiga, causing it and Kanna to start cracking. | ||||
| 49 | Down to the Bone | April 18, 2007 ISBN 4-09-121027-9 | June 8, 2010 ISBN 978-1-4215-2999-8 | |
| ||||
| Inuyasha breaks the copied Tetsusaiga and recovers all the abilities. Kanna explodes, showing Kagome a white point inside the Shikon Jewel with her last words: "The light will kill Naraku."
During the new moon, the group finds a place haunted by a bone-manipulating youkai. Miroku and Sango confront the youkai, which is looking for bones to heal its sick father. The youkai decides to make medicine out of Sango's boomerang and captures them in a bone cage. Kirara escapes to warn Inuyasha, Kagome and Shippo. Miroku gets poisoned; to save his life, Sango is forced to destroy the youkai's father and her boomerang. Inuyasha defeats the youkai. The group goes to Yakurou Dokusen to fix Sango's weapon and heal Miroku. | ||||
| 50 | Green Monster | July 18, 2007 ISBN 4-09-121156-9 | July 13, 2010 ISBN 978-1-4215-3000-0 | |
| ||||
| InuYasha and Sesshomaru fight their father's old foe Shishinki, who turns out to be the source of the Meidou Zangetsuha power that Tensaiga was built to contain. As the brothers fight side by side, Tensaiga resonates with Tetsusaiga and finally forms the full-circle Meidou Zangetsuha, defeating Shishinki. Tetsusaiga absorbs the Meidou Zangetsuha power from Tensaiga, angering Sesshomaru. Byakuya takes on InuYasha's group except for Sango, who uses her new and stronger boomerang to stop Naraku from taking Kohaku's shard. | ||||
| 51 | Outfoxed | October 18, 2007 ISBN 4-09-121198-4 | August 10, 2010 ISBN 978-1-4215-3001-7 | |
| ||||
| Intending to absorb Tetsusaiga's powers, Sesshoumaru adds a fragment of Kanna's mirror to Tensaiga, but it breaks when he fights InuYasha, creating the Black Tetsusaiga with the full-circle Meidou Zangetsuha power.
Shippo takes the kitsune exam for advanced demon magic and gets promoted to lower senior 8th rank for fooling Inuyasha. InuYasha's group pursues one of Naraku's spiderwebs to a village. The spiderwebs manipulate the dead body of the village miko, Hitomiko, into separating Kagome from the rest of the group to attack her. | ||||
| 52 | Transformations | January 18, 2008 ISBN 4-09-121267-0 | September 14, 2010 ISBN 978-1-4215-3002-4 | |
| ||||
| Kagome uses her bow's spiritual power to escape from Hitomiko, who tells her that something is sealing her power. Narau creates a new detachment, Magatsuhi, which acts unlike his previous detachments and is the evil spirit of the Shikon Jewel itself. Looking for the last jewel shard, Magatsuhi attacks Sesshomaru, who is at a disadvantage without the Meidou Zangetsuha and one arm. Inuyasha's group comes to support Sesshomaru, whose missing arm regenerates with the new sword Bakusaiga. Magatsuhi retreats. Totosai explains that liberated from the need for Tetsusaiga, Sesshomaru has now surpassed his father in power. | ||||
| 53 | Direct Attack | April 18, 2008 ISBN 4-09-121339-1 | October 12, 2010 ISBN 978-1-4215-3003-1 | |
| ||||
| Magatsuhi seals off Kagome's spiritual power, leaving her unable to purify Kohaku's tainted shard. She returns to modern Tokyo to take her high school entrance exams. Magatsuhi implants part of himself into Kohaku to make him run toward Naraku, but Sesshomaru breaks his control. When Naraku captures Kagome, Kohaku uses Kikyo's light to destroy Naraku's body. Naraku takes the last jewel shard from Kohaku. Magatsuhi takes control of Rin. | ||||
| 54 | United Front | July 11, 2008 ISBN 4-09-121428-2 | November 9, 2010 ISBN 978-1-4215-3004-8 | |
| ||||
| Kikyo's light detaches from the last jewel shard to remain in Kohaku's body and save his life, but without the light, the shard becomes tainted like the rest of the Shikon jewel.
When Kagome returns from her middle-school graduation, Naraku uses the complete Shikon jewel to transform into a gigantic spider with Rin inside his body. InuYasha's group and Sesshoumaru enter Naraku's body to save Rin, but Naraku uses the tainted jewel to take advantage of the darkness in their hearts. Magatsuhi takes control of InuYasha's demon blood to make him fight Sesshomaru. Kagome tries to use Tetsusaiga to return Inuyasha back to normal. | ||||
| 55 | Power of the Jewel | October 17, 2008 ISBN 4-09-121480-0 | December 14, 2010 ISBN 978-1-4215-3005-5 | |
| ||||
| Tenseiga defeats Magatsuhi, unsealing Kagome's spiritual powers. Naraku tries to make Sango kill Rin. Kagome fires an arrow at Naraku, preventing Miroku from fatally overstraining his Wind Tunnel. Naraku's body start to collapse from the combined attack of Tetsusaiga's Meidou Zangetsuha and Sesshoumaru's new sword Bakusaiga. Byakuya attacks Kagome; Tetsusaiga destroys him with the Meidou. | ||||
| 56 | Curtain of Time | February 18, 2009 ISBN 4-09-121580-7 | January 11, 2011 ISBN 978-1-4215-3299-8 | |
| ||||
| Naraku's body collapses. Kagome shoots an arrow through the Shikon Jewel to purify Naraku's soul, but the jewel grants his last wish. She disappears into another Meidou created by Byakuya's attack.
Inside the Meidou, the jewel tries to tempt Kagome into wishing to return to her world, which would leave the jewel completely tainted. Inuyasha uses Tetsusaiga's Meidou to find Kagome. No longer fearing abandonment, she wishes that the Jewel would disappear forever. In an epilogue three years later, Miroku and Sango have three children. Shippou is now a senior 7th rank in the Kitsune demon magic exam. Kohaku is strengthening his demon-slaying skills alongside Kirara. The old flea Myoga is with Totosai and Rin with Kaede (often visited by Sesshoumaru and Jaken). Kagome returns to the Feudal Era and decides to stay there with Inuyasha. | ||||
References
General
- "Official list of InuYasha Japanese manga volumes" (in Japanese). Shogakukan. Retrieved April 28, 2008.
Specific
- ↑ Ho Lin (April 22, 2009). "Takahashi News: Inuyasha Unflipped". Viz Media. Retrieved April 24, 2009.
- ↑ 犬夜叉 1 [InuYasha 1] (in Japanese). Shogakukan. Retrieved November 11, 2010.
- ↑ 犬夜叉 2 [InuYasha 2] (in Japanese). Shogakukan. Retrieved November 11, 2010.
- ↑ 犬夜叉 3 [InuYasha 3] (in Japanese). Shogakukan. Retrieved November 11, 2010.
- ↑ 犬夜叉 4 [InuYasha 4] (in Japanese). Shogakukan. Retrieved November 11, 2010.
- ↑ 犬夜叉 5 [InuYasha 5] (in Japanese). Shogakukan. Retrieved November 11, 2010.
- ↑ 犬夜叉 6 [InuYasha 6] (in Japanese). Shogakukan. Retrieved November 11, 2010.
- ↑ 犬夜叉 7 [InuYasha 7] (in Japanese). Shogakukan. Retrieved November 11, 2010.
- ↑ 犬夜叉 8 [InuYasha 8] (in Japanese). Shogakukan. Retrieved November 11, 2010.
- ↑ 犬夜叉 9 [InuYasha 9] (in Japanese). Shogakukan. Retrieved November 11, 2010.
- ↑ 犬夜叉 10 [InuYasha 10] (in Japanese). Shogakukan. Retrieved November 11, 2010.
- ↑ 犬夜叉 11 [InuYasha 11] (in Japanese). Shogakukan. Retrieved July 17, 2011.
- ↑ 犬夜叉 12 [InuYasha 12] (in Japanese). Shogakukan. Retrieved July 17, 2011.
- ↑ 犬夜叉 13 [InuYasha 13] (in Japanese). Shogakukan. Retrieved July 17, 2011.
- ↑ 犬夜叉 14 [InuYasha 14] (in Japanese). Shogakukan. Retrieved July 17, 2011.
- ↑ 犬夜叉 15 [InuYasha 15] (in Japanese). Shogakukan. Retrieved July 17, 2011.
- ↑ 犬夜叉 16 [InuYasha 16] (in Japanese). Shogakukan. Retrieved July 17, 2011.
- ↑ 犬夜叉 17 [InuYasha 17] (in Japanese). Shogakukan. Retrieved July 17, 2011.
- ↑ 犬夜叉 18 [InuYasha 18] (in Japanese). Shogakukan. Retrieved July 17, 2011.
- ↑ 犬夜叉 19 [InuYasha 19] (in Japanese). Shogakukan. Retrieved July 17, 2011.
- ↑ "Inuyasha, Vol. 19". Viz Media. Archived from the original on July 17, 2011. Retrieved July 17, 2011.
- ↑ 犬夜叉 20 [InuYasha 20] (in Japanese). Shogakukan. Retrieved July 17, 2011.
- ↑ "Inuyasha, Vol. 20". Viz Media. Archived from the original on July 17, 2011. Retrieved July 17, 2011.
- ↑ 犬夜叉 21 [InuYasha 21] (in Japanese). Shogakukan. Retrieved July 27, 2011.
- ↑ 犬夜叉 22 [InuYasha 22] (in Japanese). Shogakukan. Retrieved July 27, 2011.
- ↑ 犬夜叉 23 [InuYasha 23] (in Japanese). Shogakukan. Retrieved August 9, 2011.
- ↑ 犬夜叉 24 [InuYasha 24] (in Japanese). Shogakukan. Retrieved August 9, 2011.
- ↑ 犬夜叉 25 [InuYasha 25] (in Japanese). Shogakukan. Retrieved August 9, 2011.
- ↑ 犬夜叉 26 [InuYasha 26] (in Japanese). Shogakukan. Retrieved August 9, 2011.
- ↑ 犬夜叉 27 [InuYasha 27] (in Japanese). Shogakukan. Retrieved August 9, 2011.
- ↑ 犬夜叉 28 [InuYasha 28] (in Japanese). Shogakukan. Retrieved August 9, 2011.
- ↑ 犬夜叉 29 [InuYasha 29] (in Japanese). Shogakukan. Retrieved August 9, 2011.
- ↑ 犬夜叉 30 [InuYasha 30] (in Japanese). Shogakukan. Retrieved August 9, 2011.
- ↑ 犬夜叉 31 [InuYasha 31] (in Japanese). Shogakukan. Retrieved August 9, 2011.
- ↑ 犬夜叉 32 [InuYasha 32] (in Japanese). Shogakukan. Retrieved August 9, 2011.
- ↑ 犬夜叉 33 [InuYasha 33] (in Japanese). Shogakukan. Retrieved August 9, 2011.
- ↑ 犬夜叉 34 [InuYasha 34] (in Japanese). Shogakukan. Retrieved August 9, 2011.
- ↑ 犬夜叉 35 [InuYasha 35] (in Japanese). Shogakukan. Retrieved August 9, 2011.
- ↑ 犬夜叉 36 [InuYasha 36] (in Japanese). Shogakukan. Retrieved August 9, 2011.
- ↑ 犬夜叉 37 [InuYasha 37] (in Japanese). Shogakukan. Retrieved August 9, 2011.
- ↑ "InuYasha Vol. 37". Viz Media. Retrieved April 13, 2009.
- ↑ 犬夜叉 38 [InuYasha 38] (in Japanese). Shogakukan. Retrieved August 9, 2011.
- ↑ 犬夜叉 39 [InuYasha 39] (in Japanese). Shogakukan. Retrieved August 9, 2011.
- ↑ 犬夜叉 40 [InuYasha 40] (in Japanese). Shogakukan. Retrieved August 9, 2011.
External links
- Interview with English translator